Friday, March 11, 2011

A Peak Into My Cozy Little Kitchen!

     This week I've began to add some Spring decor into my house.  I love this time of year, because I feel like the light and bright colors freshen up my kitchen!  Here's a look at some of the details and nooks in my kitchen that I love.


I just love the beautiful bouquet of hydrangeas my husband surprised me with yesterday!  He's so thoughtful!  They look perfect on my new tablecloth.
This corner of the table gets the best sunlight, so I usually photograph my food here.


I love the early morning sunshine pouring into our dining area through the french doors.  The lighting is beautiful and makes our table so inviting to sit and drink coffee.  The fireplace, in the background, is our favorite place to gather in the winter!


This mahogany table is an antique.  It was my husband's great grandmother's table, and we absolutely love having it in our home.  The detail of the carving in the chairs are lovely.  I think it ties in especially well with this tablecloth! 


This bowl is filled with some beautiful produce, from The Fresh Market (my favorite place), that includes meyer lemons, blood oranges and heirloom tomatoes!  Something about this tuscan style bowl and fresh fruits and vegetables reminds me of a pretty farm-like setting.    Especially with the flowers being in a pitcher instead of a traditional vase.  Ah...the small things in life!


I love this spice rack!  I got it at Target, and it has so many essential spices and herbs.  The roundy jars are so cute, too!  My "chef's" knife there is what I use to cut all of my veggies with.  You may have seen it before in some of my food preparation photos.  That is one of my new brightly colored napkins I bought on sale at Pier 1.  Aren't they cheerful!? 


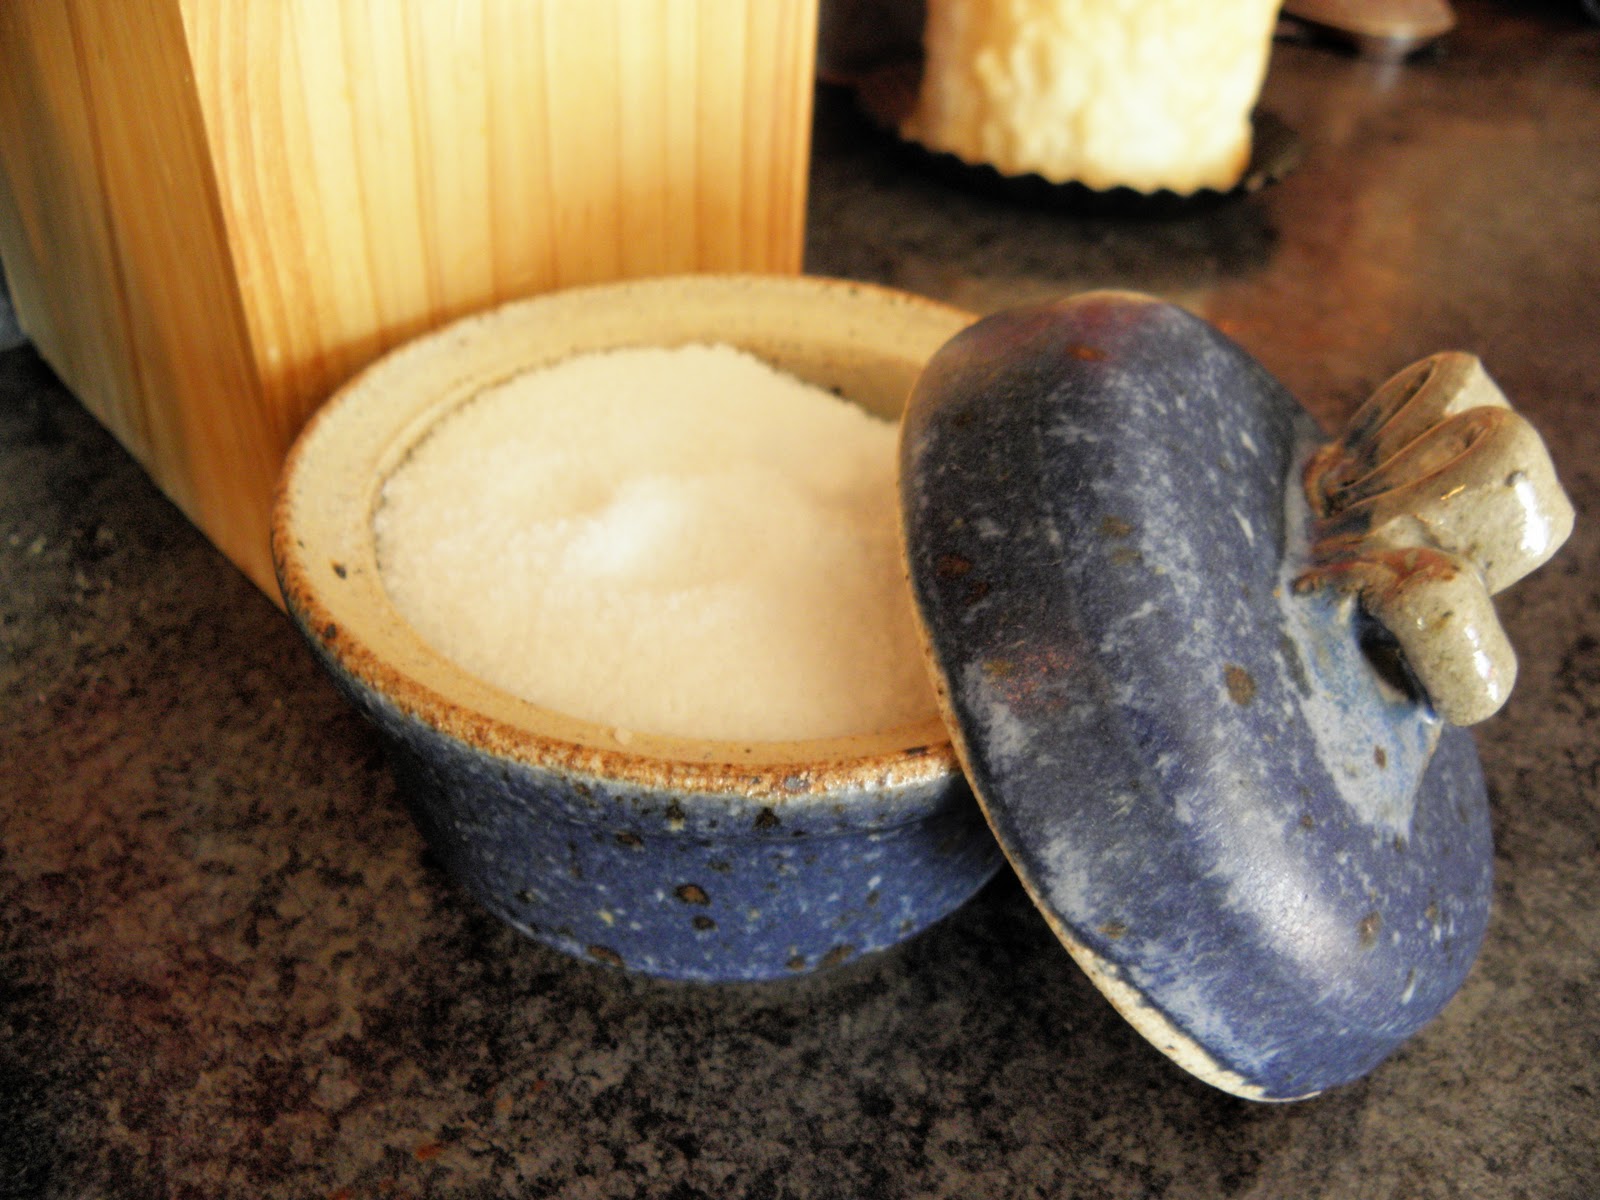
On the other side of my stove I have a pretty little spoon rest and more seasonings.  Extra virgin olive oil, balsamic vinegar, table salt, pepper grinder (love!) and my beautiful new salt crock that my husband just surprised me with!  It's handmade pottery from Spain!  I keep kosher salt in there. :)  It just makes me happy. 


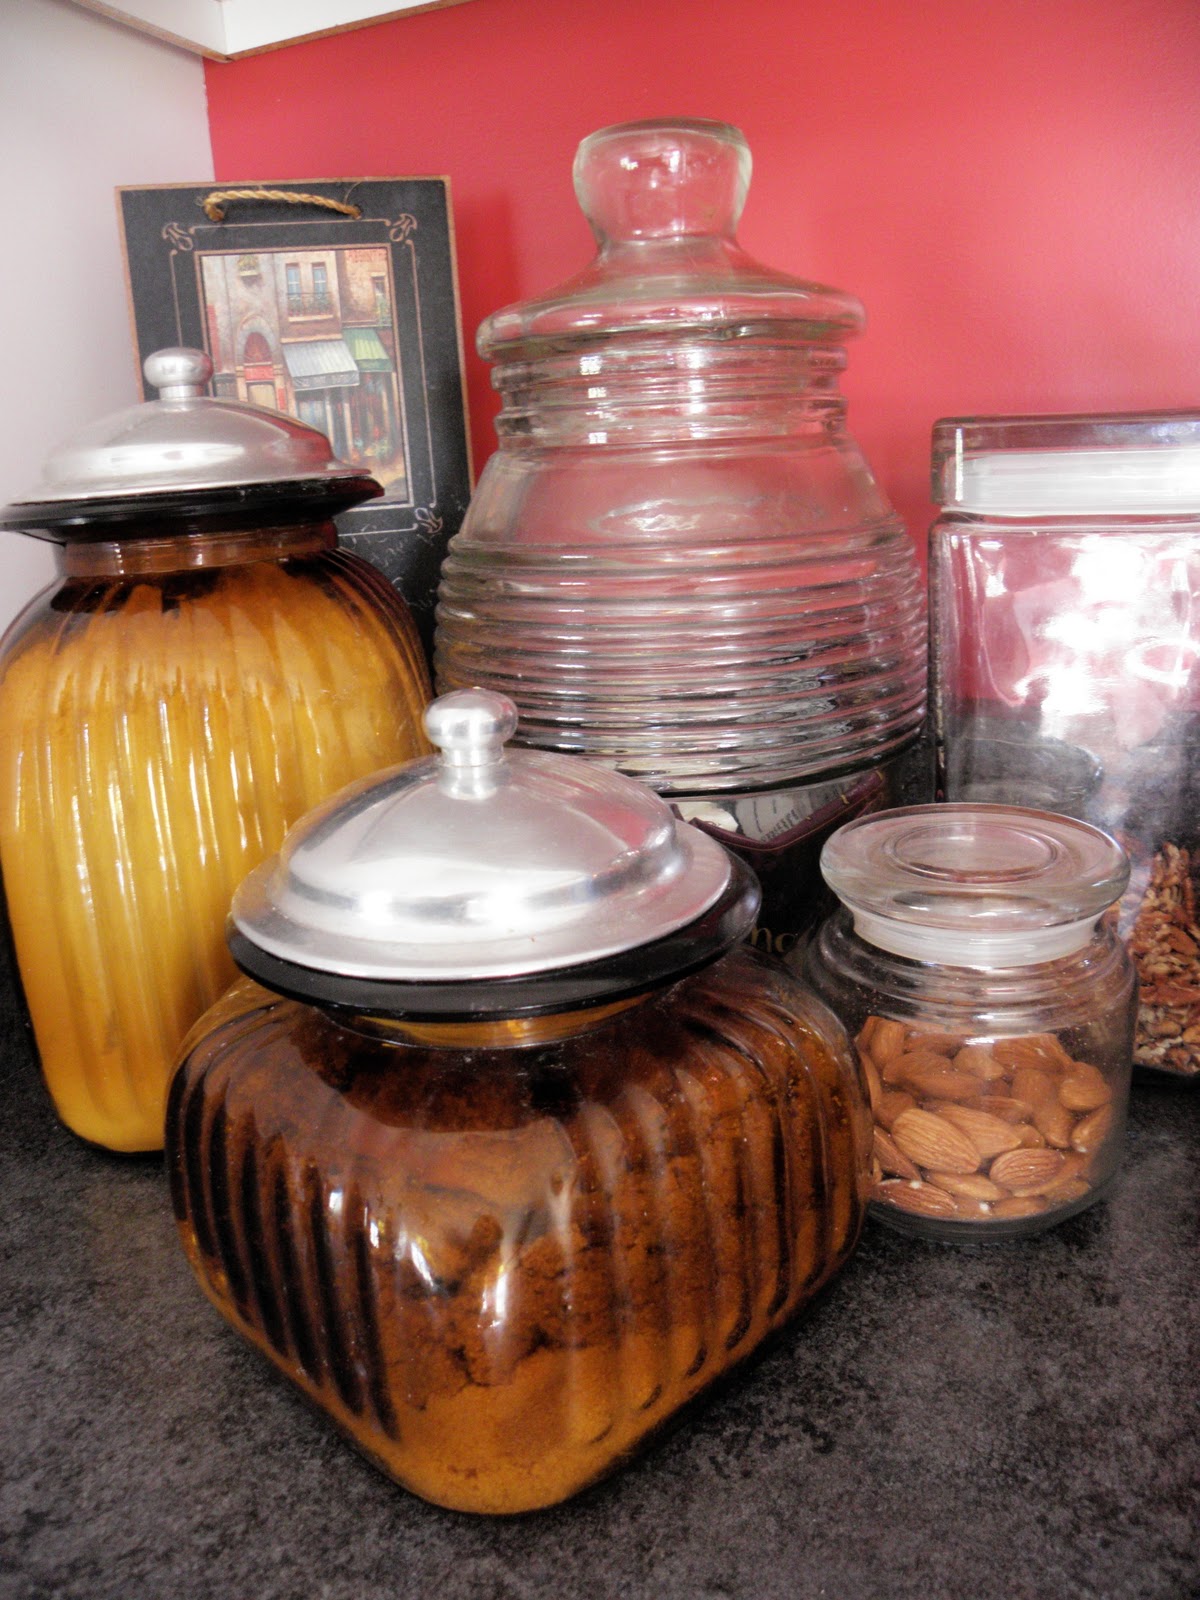
In this corner I have all of my large jars arranged as a baking station.  They hold everything from flour to nuts to chocolate chips! I bought them at various places.  In the back is a little chalkboard with a European street scene on it.  I was given it about 4 years ago, when my husband wrote a sweet message on there to me.  I haven't used it since.  The message is still there!

In the other corner is my coffee station.  LOVE coffee! Too much?...Nah.  This is a Cusinart Grind n Brew coffeemaker that was a Christmas present from my In-Loves.  I like to store my coffee and beans in different jars for a unique and coffee shop/country look that I think is very cozy!  The platter in the background was a present from my parents for our 1st wedding anniversary.  I love filling my  house with things that mean a lot to me.  


A little bit of European flair.


I like my new kitchen rug I just got (on sale of course) at Pier 1.  I recently added the distressed iron work for a more interesting detail above the sink.


Some of my favorite cookbooks are in my kitchen for easy access.  The rest are on a bookshelf in the guest room. The Keeping Good Company is such a cute cookbook with homestyle recipes and the cutest illustrations. I love Gooseberry Patch Cookbooks, Tyler Florence and Ina Garten's especially.  These are all very good, though!  Oh and the Better  Homes and Garden's is spot-on for reliable basic recipes.  Love their lasagna!  

Mom gave one of these to me and my sister for Christmas.  I've learned so much from her.  Look at the adorable detailed illustration on here.  It is just too cute not to display!


A peek of spring in my display cabinet.  Here are the new napkins I bought, just waiting for a picnic! 


Isn't this just a pretty, girlie spring time mug?  I love the soft colors and detail of the polka dot rim with flowers.  I have several more spring mugs that I love drinking coffee from.  They just make me smile. :)


I just love this new basket to store all of my pans in!  I am going to write on the tiny chalkboard, "Baking Pans"!  A good friend gave me this idea--she's done the very same thing.  I think it's so cozy and cute and practical.  It's a huge basket that stores a lot and makes a statement, but the little chalkboard personalizes it.  This is new to my kitchen, and I'm pretty excited about it!  I think baskets are always a good idea.


So there it is!  A peak at my cozy little kitchen where I prepare everything you read about on here. The kitchen is the hub of our home, and it brings me a lot of joy to share it with you!  
Thanks for stopping by!


Now...off to make lemon tuscan chicken!

~Leslie


Monday, March 7, 2011

Herb & Mustard Glazed Broiled Salmon


     This was my first attempt to make salmon and I was very pleasantly surprised at how good it turned out!  We both love salmon and have eaten at several places but until recently, I've never cooked it at home.  This was a very good dish that we really enjoyed eating one day after church!  It's derived from a Giada De Laurentiis recipe. (She's one of my favs:) I did change a couple of things, like lime juice instead of wine.  So I changed the recipe below accordingly. I love all the flavors from the marinade that infuse the fish.  Salmon is pretty hardy and flavorful fish by itself, so it can take more intense seasoning and flavors without it being overwhelmed like other more delicate fish.  The fresh rosemary and honey dijon mustard make gave the salmon a perfect depth of savory flavor making it delicious!  I cooked in a cast iron skillet so that I could sear in on the stove and then put it under the broiler and get a good sear on it. As you are probably following, my cast iron skillet it my cooking companion!

     I raided our somewhat empty fridge and pantry and decided to serve the salmon on a simple bed of roasted broccoli and parmesan orzo!  This salmon is a perfect dish for the spring  when you're trying to lighten your menu up a bit from heavy stews and cassaroles.  It would also be great with asparagus or a fresh tomato salad.  Hope you try it out and let me know what you think...enjoy!


Herb Mustard Glazed Broiled Salmon


2 garlic cloves

3/4 tsp. finely chopped fresh rosemary

3/4 tsp. finely chopped fresh thyme (I used dried here)

1 Tbsp. lime juice

1 Tbsp. extra virgin olive oil

1 Tbsp. honey dijon mustard

2 Tbsp. whole grain mustard

non stick olive oil spray

6 salmon fillets

salt and pepper


Chop the herbs very finely and the garlic. I used pre-minced garlic.  Mix with some salt and pepper, lime juice, mustards and slowly drizzle in olive oil.  Stir until well combined.  You can also do this in a mini food processor.  Once combined, set aside.

Preheat broiler.  Spray non stick on a large cast iron pan and put on the stove on med high. Salt and pepper each salmon fillet well.   Place salmon fillets(about 3 will fit) on the sizzling pan for about 2 minutes.  Place the pan under the broiler for about 2 more minutes.  Remove and spread the tops of salmon evenly with the herb mustard glaze and place back under the broiler for about 4-5 minutes or until cooked through and beautifully browned.  Repeat with remaining fillets.

Carefully transfer to a plate and serve with lemon wedges.

Wednesday, February 23, 2011

Sweet Little Cherry Pie Tartlettes


     I've always loved history.  Not only was it my favorite subject all through school, but even now I love to go on trips to historical places and tour old homes from centuries ago!  That is probably what fuels my love for Europe all anything "old world".  Homes, streets and businesses with old stone or brick, walls and floors that are bursting at the seems (sometimes literally!) with stories to tell fascinate my husband and I! I love a period film or a restaurant with the flair of another era.  Don't worry, there is a point to all of this. :)

     Now back to the really good stuff--the pie!...

     So, of course I've always loved George Washington's birthday.  In grade school we learned about the story about a young Washington cutting down the little cherry tree that he couldn't lie to his father about.  You know the story...perfect for children...especially whenever you have an object lesson like making a cute little cherry pies!  After all these years I still enjoy celebrating the birthday of one of the very best Presidents America has ever had, with baking a cherry pie.  (My husband love this tradition!)  This year I thought I would make these sugar-sweet, little tartlette pies.  Not sure what to call them, but I think something that ends with "lette" is so cute! 

  
     They are easy to make, and would be a perfect dessert for your children to help with! The filling is so much tastier than canned pie filling, and the frozen sweet cherries make this recipe surprisingly easy!  There is just enough sugar to sweeten them but not too much!  With the egg wash and sprinkled sugar on the top, you will get unbelievably crisp crust that's irresistably good!  This recipe is very similar to my Sugar Laced Cherry Pie, which would also be perfect to make for this holiday!  I just love these adorable baby pies, and I think you and your kids will, too!

 
Cherry Pie Tartlettes


1 bag frozen dark, sweet cherries

1/4 c. sugar

1 Tbsp. lemon juice

1 Tbsp. cornstarch

1 pkg. (2) refrigerated pie crusts

1 egg

1 Tbsp. sugar for sprinkling


In a bowl, place cherries with the next three ingredients.  Let sit for about 20 minutes or so stirring occasionally, or until the juices have created a yummy syrup. 


Unroll the pie crust.  Using a  biscuit cutter, make 3 in. circles until all the crust in used up.       .

Place about 4 cherries (with juice) onto a circle and place another one on the top, like a sandwich.  Fold and crimp the edges like you would a pie.

Place on a sheet pan lined with parchment paper or aluminum foil, because your little pies will leak juice.  It is going to happen, so don't worry!  Makes tiny slits in the top and brush with an egg wash.  (Egg wisked with a little water.) Sprinkle heavily with sugar over the top.

Bake at 375 degrees for about 30 minutes. Carefully remove from the pan before any of the spilled juice hardens, making it difficult to remove.  Eat warm and enjoy!  Makes about 10-12.

Tuesday, February 15, 2011

My Valentines Day, Chocolate Chip Cupcakes with Homemade Chocolate Chip Buttercream Frosting


     These cupcake are truly a sweet tooth lover's delight!  There are no words for how happy these little polka dotted cakes make me feel and that is why I made them for my loved ones this Valentines!  Mini chocolate chips are piled in a (completely homemade) batter that is so fluffy yet moist from sifted cake flour and whipped egg whites then drenched with an entire tablespoon of real vanilla extract.  This perfectly delicious cake is then piled up with a rich and dreamy buttercream frosting specked with lots of semi sweet chocolate chips.  I'm drooling. No...really!  This is some good stuff!!!


     I won't lie.  These cupcakes take a little time to make, but really what doesn't when you make something  from scratch?  They are more than worth the time it takes to make!  For a few tips...I advise you to be sure and use cake flour because it will lend to a perfect "crumb" for the cake.  That is how you can make your cakes taste like you ordered them from your favorite bakery.  I have used regular chocolate chips in the batter in the past, but found the minis work best because they don't sink to the bottom and make the cake too rich.  As for the frosting, you will have to judge yourself how much cream to add.  I was originally planning on piping the frosting so I didn't add as much, but I ended up deciding to just spread it on.  I think when piping it should be a little thicker, than if you are just spreading it on.  Which reminds me, this frosting would be amazing on a cake--especially chocolate cake!  There was a bakery we loved to go to in Louisville that had a yummy chocolate cake with buttercream frosting.  How good would that would be with this chocolate chip buttercream!


     No joke, these could be my favorite cupcakes of all time!  I was thrilled whenever I decided to make them for my husband (who loves them as much as me) and our friends for Valentines Day.  I actually found myself getting more excited as I prepped to bake these by getting all my ingredients out, setting out the butter, sifting the flour and powdered sugar, and pulling the chocolate out of the cabinets!  I'm happy to say that these cupcakes were made with lots of love, shared in love, and were eaten on the day of Love....Oh how, Lovely!


Chocolate Chip Cupcakes

3 1/4 c. sifted cake flour (not self rising)

1 1/2 Tbsp. baking powder

1/4 tsp. salt

7 oz. (1 3/4 sticks) butter, softened

1 3/4 c. sugar

1 c. + 2 Tbsp. milk

1 Tbsp. pure vanilla extract

5 egg whites, whipped to stiff peaks (See picture)


2 c.(1 bag) mini semi-sweet chocolate chips


Preheat oven to 350 degrees.  Line standard muffin tins with cupcake liners.  Whisk dry ingredients together in a large bowl. Mix any remaining wet ingredients (milk and vanilla) in a separate bowl. Cream butter and sugar with a mixer until light and fluffy.  Reduce speed to low.  Add dry ingredients to butter mixture in about 3 additions, alternating with wet and ending with dry.  Beat egg whites to stiff peaks. (*A little tip: Leave egg whites sitting out in the bowl at room temperature for 30 minutes before whipping them, for maximum volume!)  Gently fold whipped egg whites into batter.  Fold in chocolate chips.  Divide batter among cups and bake for 23- 25 minutes.  Allow to cool and then frost with Chocolate Chip Buttercream.  Makes 24 cupcakes.


Chocolate Chip Buttercream Frosting

1 lb. powdered sugar, sifted
  
        3 sticks of butter, softened
  
        1 Tbsp. pure vanilla extract
  
        2-3 Tbsp. whipping cream
  
        1 bag of semi sweet chocolate chips

Beat butter with a mixer until light and creamy. Add vanilla. Turn mixer 
to low and gradually add powdered sugar and cream.  Mix very well. 
Add more cream to thin it out or more powdered sugar to thicken it up if you need to.  Stir in chocolate chips. 
Immediately frost cupcakes. 

Wednesday, February 9, 2011

Pot Roast with Carrots & Potatoes and Roasted Green Beans


     What's more comforting than to come home from work or church to find a complete, ready-to-eat pot roast dinner with delicious carrots and potatoes?!  Pot roast is one of those classic meals that have been around for decades and can be made a hundred different scrumptious ways!  I love making mine in a crock pot so that the meat gets incredibly tender and the vegetables drink in all the drippings and seasonings.  YUM!

     This is a delicious Paula Dean recipe that I tried for the first time.  The only changes I made was that I used a slightly tougher eye of round roast instead of the more succulent (and quite fatty) chuck roast.  The eye of round was on sale at the grocery, and since I slow cook mine anyways I knew it would get nice and tender...and it did!  Also, I didn't have any wine like it calls for, so I added more water.  You could also add beef broth if you have it.  Thirdly, I like to add potatoes and carrots to all my beef roast recipes and that's what I did.  The gravy that come from the drippings and cream of mushroom soup (among other good  things) made the veggies so flavorful!  I used whole baby carrots and  baby Yukon gold potatoes cut in quarters, but you can use whatever kind you have on hand.  I love using leftovers for beef stew or shred it and add with more sauteed onions, peppers and cheese for a Philly cheese steak sandwich.

Yes this is another pot roast recipe, but why not give a new twist on an old meal and get excited about pot roast again!  I served it up with my roasted French green beans.  (Fresh green beans, kosher salt, and pepper tossed in a little olive oil in a 425 degree oven for about 15 minutes.) These are really tasty and a perfect vegetable that's healthy and adds color to the plate!  So get you crock pot back out, and surprise yourself with how incredibly good and easy this Slow Cooked Pot Roast what Carrots and Potatoes really is!
Pot Roast
1 (3-4 lb.) Boneless chuck roast
1 tsp. House Seasoning, recipe follows
1 tsp. Salt
1/2 tsp. Black pepper
2 Tbsp. Canola oil
1 c. Thinly sliced onion
3 Cloves garlic crushed
2 Bay leaves
1 (10 3/4 oz.) Can cream of mushroom soup
1/4 cup Red wine
2 Tbsp. Worcestershire sauce, low sodium
1 Tbsp. Beef bouillon granules or 1cube
3/4 cup Water


Preheat oven to 350 degrees if you are using the oven.  If using a crock pot, like me, set on low.  Add house seasoning, salt and pepper to a small bowl.  Rub seasoning into the roast on both sides.  Heat oil in a large (preferably) cast iron skillet and brown the roast, searing on both sides.  Place the meat in the crock pot.  Add the onions and garlic in the skillet for just a minute or 2 to absorb all the leftover roast juice.  Place into the crock pot and on the roast and add bay leaves.

(This is whenever I add the carrots and cut up potatoes into the crock pot.)

Combine the mushroom soup, wine, Worcestershire sauce and beef bouillon into a bowl.  Pour over the roast and add water.

Cover and keep on low in the crock pot for 8 hours.  If baking in the oven, cover pan with foil and bake for 3- 3 1/2 hours. Either way, cook until the meat is very tender.

Remove and discard bay leaves.

Take out of the pot, cover in foil, and allow to rest for 10 minutes before slicing or shredding.  Serve with the vegetables on a platter and enjoy!


House Seasoning
 1 c. salt
1/4 c. black pepper
1/4 c. garlic powder

Mix ingredients and store in an airtight container for up to 6 months.

Tuesday, February 1, 2011

Lovely Baked Apple Pancake with Homemade Caramel Sauce

  
     February is the month of love!  Valentines Day is on the way, and I'm reminded of all the wonderful family and friends that God has placed in my life.  You know, Valentines Day isn't just a celebration of love for couples, but I find that it's a time to share with any loved one in your life how much they mean to you!  Of course this is something that we should try to do all throughout the year, but I think that it's pretty neat for there to be a specific day set aside to highlight romance for couples and God's love to our family, friends...also lonely elderly people and widows that are too often forgotten.  Thank you Lord for blessing us with loved ones!  Happy Valentines Day!!!

  
     Where do I start telling you how much I LOVE this beautiful pancake?!  My amazing husband actually was first to make this!  The morning after getting back home from a week long girl's trip with my mom and sister he surprised me by waking up early to prepare this lovely, personal sized heart shaped pancake that he drizzled with luscious homemade caramel sauce!

Talk about love!!!

He's such a thoughful husband that I have to brag on for minute.  As busy as he stays being in medical school (and trust me whenever I say that "busy" is an understatement), he has always taken the time to make me feel as though I'm the only important thing to him on this earth!  He never forgets the details in life--and he knows that I appreciate every one of them:) Honey, I love you so much!

  
     So, back to this scrumptious breakfast treat.....This is a pancake that is baked in the oven and is made to slice and share.  It consists of a batter that is poured over sugary apples and pecans in a buttery skillet and baked to golden brown.  The delicate pancake is then turned over onto a platter for the pretty apple design to show.  It is then showered with snow-like powdered sugar and drizzed with caramel sauce for a perfectly wonderful presentation that will not be left for long!!  This is a recipe that is every bit tasty as it is beautiful!  I love the heart shape pancake my husband made me.  That would be perfect for a Valentines Day treat for your Love or your lovely children!  Otherwise I use my 7 in. cast iron skillet, and it turns out great!  The recipe calls for Granny Smith apples originally, but we use Jonathan's when they are in season.  The caramel sauce is an added decadence since it is homemade!  Rich, dark and almost buttery--it's the perfect combination with the tart apple!  While the pancake is baking is the perfect time to make the sauce, and that way it's still warm and ready when you flip out the pancake.

     I really hope that you've been inspired to try something different, like this Baked Apple Pancake to treat yourself or someone special in your life!  Let this melt in your mouth and it will feed your soul as well as your tummy!  What are you waiting for?...go get your apron and get ready to surprise someone YOU love!


Baked Apple Pancake with Homemade Caramel Sauce


8 eggs
1 c. all-purpose flour
3 Tbsp. granulated sugar
1/2 tsp. salt
1/2 tsp. ground cinnamon
1 1/2 c. buttermilk
1 tsp. vanilla extract
cooking spray
1/2 c. butter
3 Granny Smith or Jonathan apples,peeled & thinly sliced
1/2 c. firmly packed brown sugar
Powdered sugar

Chopped, toasted Pecans

Whisk together eggs and next 4 ingredients.  (Mixture will be lumpy.)  Add buttermilk and vanilla, whisking until batter is blended.

Coat a 7in.(ish) oven safe skillet with cooking spray, and sliced stick of butter.


Bake at 425 degrees for about 5 minutes or until the butter melts.  Place apple slices evenly, going around in a circle into the skillet.  Pour the batter into the skillet to coat the apples.  Sprinkle evenly with brown sugar and 1/2 cup chopped pecans.  Bake 35-45 more minutes.

Carefully turn out the pancake onto a plate or platter.  If a few apples are out of place, don't worry, put them back!  Right before serving, dust the pancake with powdered sugar and drizzle with homemade caramel sauce or maple syrup and sprinkle with chopped, toasted pecans.  Serve warm!


~~~~~~~~~~~~~~~~~~~~~~


Caramel Sauce
1 c. firmly packed brown sugar
1/2 c. whipping cream
2 Tbsp. butter
1 tsp. vanilla extract

Combine brown sugar and whipping cream in a heavy saucepan; cook over med-low heat, stirring constantly for 3 minutes or until bubbly. (mixture may look curdled)  Cook, stirring constantly 2 more minutes.  Remove from the heat; add butter and vanilla, stirring until blended.  Cool 3-5 minutes.


Linking up with: